How to prepare cold brew at home
19 June 2024How to make heart in cappuccino
If a good cappuccino made with well-foamed milk is nowadays a must, even a cappuccino with a nice latte art is becoming an unmissable value. Let’s see how to make heart in coffee!
We all agree: a well-made cappuccino or flat white, with a nice shiny and velvety cream is a fundamental element for every cafè that aspires to have a certain level. Yes, in a professional environment, but not just in it, even at home, we can share our passion for coffee with our relatives offering them a beautiful heart on their cappuccino!
If your problem is therefore that of learning how to froth milk to make cappuccino, solve it as soon as possible, perhaps by taking part in one of our basic coffee making courses
or, finally, by purchasing a video course to watch comfortably whenever you want.
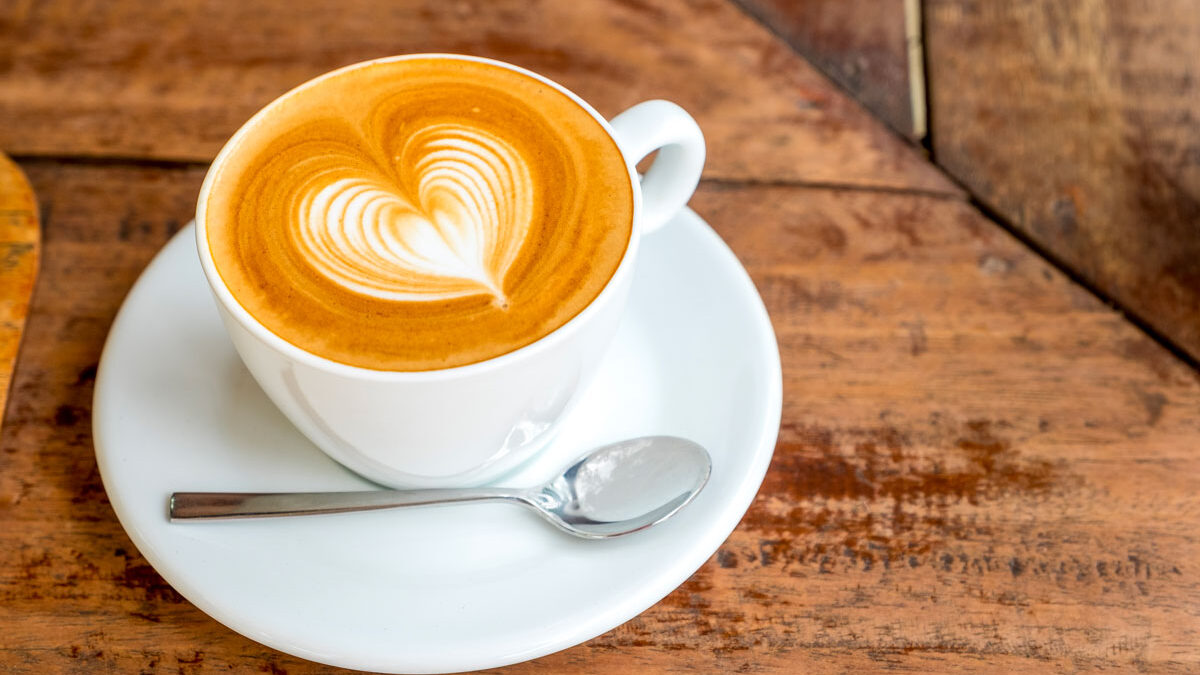
Well, at this point we have learned how to froth a super “latte” with the standards of the photo you see below
it’s now the time to go straight to the latte art, cappuccinos with drawings. A pattern, a decoration on the cappuccino is in fact an element that will significantly reinforce the experience; it will put much higher the perception your parents or clients have of your barista skills!
Of these patterns, one of the simplest but also most effective is that of the heart. A design that has always reflected a sign of attention and “love” for our customer (or our beloved?) But how to do it? How to make the heart on your espresso?
To do this there are various techniques, some very simple and others more complex but more spectacular. In this post we will see the two main ones, read it, take the time to do some practice and get ready to amaze the lucky people who will enjoy your cappuccino!
Orient the cup to make the heart on the cappuccino

Good, so the heart shape will also have to be oriented towards the customer (that’s who we’re thinking of!) with the handle of the cup to the right of him. In the world of professional latte art this concept is defined as symmetry, the orientation of the figure with respect to the client’s point of view at the handle.
A fundamental concept therefore, which is valid for any technique we want to use to make a cappuccino with heart, and which will be even more valid in latte art competitions and for those who want to take exams to obtain international certifications
Draw the heart on the cappuccino with topping
Once you have learned two basic fundamentals such as milk frothing and symmetry, it is time to really dedicate yourself to making a heart on your cappuccino.
The simplest technique is sometimes defined as etching: a completely white cappuccino with a heart drawn with a topping “placed” on the surface with a squeezer.

This technique seems really simple, and in fact the design, made with the topping, really is. However, it might be less easy to froth the milk.
In fact, this design becomes particularly beautiful when it is made on a cappuccino with a completely white, shiny and perhaps quite full-bodied, thick surface. This will allow us to give our heart prominence and elegance.
Do you want to know how to froth milk with different degrees of creaminess, depending on the type of preparation to be made? Take part in this course, a course that’s right for you even if you want to know how to make flat white and other recipes!
Pour the heart shape with the latte art technique
The creation of the heart with the topping may not arouse the attention of our customers, who may not perceive the “mastery” of the bartender. If our customers are so difficult to win over, it will be time to move on to the bigger guns, to free pouring!
This technique, which allows you to create the shape of the heart simply by pouring milk, will certainly arouse their admiration!
Free pouring is the most complex and rightly most famous technique of latte art. It is based on some basic rules:
- Flow
- Height
- Wrist movement
Which are applied differently depending on the pattern we want to create. Nothing complicated, but lots of small movements that we will have to control and coordinate together. In short, a lot of practice, a little frustrating at first but then full of satisfaction.
Do you learn the basics? So let’s go and see how the heart shape is made in free pouring!
First part, it is poured form above to “Raise the canvas”
The first step to make the cappuccino with heart using the free pouring technique will be to pour it into a sloping cup about 10 cm high, between the surface of the espresso and the tip of the milk jug. The flow should be around 10 to 15 ml of milk per second (remember this figure even if it seems rather abstract, we will need it later). At this stage we will fill about half the cup.
Fundamental recommendation, always pour into the coffee, never onto the cup sides, to avoid undesired white spots on the surface which will ruin the elegance of the design!
Second part, creating the actual figure
At this point we have created a fairly large canvas on which to place our drawing. We position the tip of the litter very close to the surface of the Espresso, and begin to pour with a much greater flow than before: around 40 ml per second or, if you prefer to make it less abstract, three times more abundant.
In this phase we will simply have to fill the cup without ever moving from the point where we started pouring, to avoid crooked or elongated figures. Of course we should straighten the cup as it fills, to prevent it from overflowing!
Little advice? Pour firmly, if you pour too slowly the heart will not “take shape”!
When the cup is full we should have obtained a nice round, regular and elegant spot. It is time to reduce the flow of milk and make a “take-off” movement with the hand moving rapidly forwards and upwards, so as to create the tip of the heart. As always, the video up will clarify the movement better than a hundred words.
At this point our cappuccino is done. As I was saying, it will take a little practice to make it really beautiful but we will certainly succeed very soon, and for our customers we will become wonderful romantics!
How to make herat in coffee at home
Working in a professional environment will make it easier to learn latte art simply because, thanks to orders from our customers, we will have many more opportunities to practice.
In our home, if we are not baristas but simply coffee enthusiasts, we will have to have a lot of motivation to find the time to pour milk, trying to improve ourselves with each pour, until we obtain the necessary technical finesse. It takes time, but it’s not impossible!
It takes time and, unfortunately, a little bit of money. Especially on the espresso machine. A home espresso machine capable of frothing milk well, therefore with adequate pressure in the boiler, will probably cost over a thousand euros, and we will have to plan another investment for a suitable grinder.
We will then need a lot of milk, whole and UHT, the cheapest you can find on the market and, since we are talking about savings, try frothing water with a squirt of hand soap, you will be surprised!
Coffee? Here too it certainly doesn’t matter to have the best single origin 80+, but try not to have too much robusta in the cup, it will make a cream that is too “crusty” and not suitable for latte art!
Se il tuo problema è quindi quello di imparare a montare il latte per fare il cappuccino, risolvilo al più presto, magari prendendo parte ad un nostro corso di caffetteria base o, se non tempo, persino leggendo un post ben fatto, che parte dalla chimica del latte, oppure, infine, acquistando un videocorso da guardartvi comodamente quando vuoi


